Please note: Linux changes regularly. Because of this, the information below becomes outdated quickly. Please contact our support team for additional assistance.
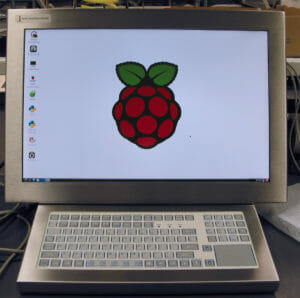
We have many customers who use our Industrial Touch Screens and Workstations as a rugged, wash-down capable front-end for a simple Raspberry Pi computer. Over the years we have written several articles about ways to both physically mount and install/calibrate the touch screen using the Raspbian OS. We’ve also written some general Linux overview articles that review the various ways to use our displays with Linux.
The Raspbian OS has evolved a bit and some of the methods we previously mentioned no longer work as written. Most importantly, newer versions now include libinput instead of evdev. Here is an updated version of our recommended method for using any Hope Industrial touch screen with the latest versions of Raspbian 9 Stretch (kernel 4.9).
As before, since our touch screen controller is a standard HID device, no specific driver is needed but we do need to do some configuration to get things working.
Download and Install evdev and evtest
First we will need to download and install evdev, a generic input event interface. As mentioned, this was replaced with libinput in more recent versions of Raspbian but it still works great for our purposes. We will be detailing instructions for using libinput in a future post. To install evdev run the following:
- sudo apt-get install xserver-xorg-input-evdev
We will also need evtest, a utility to help us find the offset parameters needed to calibrate the touch screen. To install evtest run the following:
- sudo apt-get install evtest
You may need to accept any necessary dependencies.
Configuring Calibrating the Touch Screen
The touch screen alignment requires us to set some parameters that tell the driver how to “stretch” the touch input across the available screen area. We will use evtest to find these then we will edit some config files to apply them and set other touch screen properties.
1. Run evtest.
2. evtest will list the attached input devices. Select the number of the device for the Elo TouchSystems 2218 Accutouch Interface.
3. evtest will show some configuration data then pause, waiting for input.
4. Using your finger or a stylus, touch the very top left corner of the touch screen. You will see the evtest scrolling a series of data output with both ABS_X and ABS_Y lines, followed by numeric values:
Event: time 1374175747.420998, type 3 (EV_ABS), code 0 (ABS_X), value 484
Event: time 1374175747.421011, type 3 (EV_ABS), code 1 (ABS_Y), value 3364
Of these values, write down the lowest observed ABS_X value and the highest observed ABS_Y value.
5. Now repeat the process, but this time touch the lower right hand corner of the screen and write down the highest ABS_X value and the lowest ABS_Y. Exit evtest (Ctrl + C).
6. Open the libinput configuration file in your favorite text editor: /usr/share/X11/xorg.conf.d/40-libinput.conf
7. Insert the following at the end of the file, replacing minX, maxX, minY, maxY (shown in red) with the valves you wrote down above.
Section "InputClass"
		Identifier "elo touchscreen catchall"
		MatchVendor "ELO"
		MatchDevicePath "/dev/input/event*"
		Driver "evdev"
		Option "InvertY" "true"
		Option "Calibration" "minX maxX minY maxY"
                Option "EmulateThirdButton" "1"
                Option "EmulateThirdButtonTimeout" "750"
                Option "EmulateThirdButtonMoveThreshold" "30"
EndSection- Note that in the MatchVendor line we are applying this configuration to all input devices with vendors with the text “ELO” in them. This should be sufficient but if you have another device connected (or multiple touch screens) you may need to be more specific. We kept it broad in this example to accommodate different versions of our touch controller.
- The options that start with “Emulate” allow tapping and holding (for 750 ms) to simulate a right click. If right-clicking is not needed, these lines can be omitted.
8. Save the file, reboot, and now your cursor should follow your finger very closely and fully support hold-to-right-click.