In this post we will continue breaking down the main components for completing a Universal Mount Monitor configuration. In Part I, we detailed the various cable exit cover plate options for our fully-enclosed Universal Mount Monitors. The next step to completing your configuration is deciding how you want to mount the monitor.
All of our Universal Mount Monitors have side yoke mount holes, as well as VESA mounting holes on the rear cover. You can mount the monitors virtually anywhere – on a pedestal anchored to the floor, attached to a wall, column or post, or even hung from the ceiling!
Heavy Industrial Mounts – we’ve designed these extremely rugged mounts to be suitable for even the toughest environments. These mounting options are all available in NEMA 4X stainless steel and NEMA 4 black powder-coated carbon steel.
Yoke Mounts
Using the side yoke mount holes, a variety of mounting configurations are possible:
- Standard Yoke Mount (YKxx models) – can be used alone for applications requiring only display tilt. No mounting hardware is included.
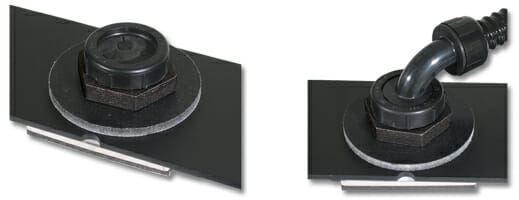
- Yoke with Pedestal/Benchtop Mounting Kit (YBxx models) – the mounting kit adds swivel capability, while a central opening allows cables to be routed through the bench (or pedestal) so there are no exposed cables. The Yoke and Pedestal/Benchtop configuration is available in NEMA 4 or 4X options. We also offer a more inexpensive benchtop kit that the customer seals with RTV (or equivalent) to achieve a NEMA 12 rating (if a NEMA 1 rating is sufficient, cavity can be left unsealed).
Pedestal Mounts
We offer two free-standing pedestal configurations – just add an industrial keyboard for a full standalone HMI workstation! Both options have internal cable routing so there are no exposed cables. If needed, an industrial KVM extender can be mounted inside of the pedestal. The 3/16″ thick steel floor mounting bracket creates an extremely sturdy mount.
- Yoke and Pedestal Mount – combined with our yoke mount mentioned earlier, this configuration provides full range tilt and swivel. The pedestal is 40″ tall.
- Fixed Pedestal Mount – 45″ tall; a non-adjustable pedestal solution.
Wall Arm Mounts
We first designed these wall arm mounts as a solution for our customers seeking an affordable stainless steel wall arm. Our Heavy Industrial Arm Mounts provide an extremely solid workstation platform in space-saving designs. These arm mounts are rated up to 100 lbs., come with our 4-year warranty, and are available in NEMA 4X heavy-gauge brushed 304 stainless steel or black powder-coated steel. The “low bounce” design makes these mounts suitable for use with our industrial keyboards. Note: measurements listed below are for the 15″/17″ mounts; please see the wall mount arm’s page for full specifications.

- 24″ Wall Mount Arm – the longer wall mount arm has three pivoting friction joints that allow for easy repositioning. It extends from a full 26.7″ into a compact 7.5″. Display tilts +/- 30° (yoke can be reversed allowing 45° tilt up and 15° tilt down). And don’t worry about taking up much space on the wall – the mounting pattern is only 2.0″ x 7.0″.
- 15″ Wall Mount Arm – our shorter wall mount arm has two pivoting friction joints. Like the 24″ wall arm, display tilts +/- 30°, or the yoke can be reversed allowing 45° tilt up and 15° tilt down. This mount folds into just 6.2″ of space and extends to 17.2″. The mounting pattern is only 2.0″ x 3.4″.
- Wall Yoke – when only display tilt is required, our Heavy Industrial Wall Yoke provides a simple but rugged solution. Display tilts up 60°, down 30°.
VESA Mounts – we offer a few VESA mount options that will allow our Universal Mount Monitors to be mounted on a wall, bench, post, or column. These mounts provide a flexible and affordable solution for mounting your monitor. All VESA mounts allow the monitor to pivot 90° for portrait-to-landscape viewing.
- VESA Radial Arm – this versatile mounting option includes a flexible mounting kit with six different base mounting configurations. It’s great because you can mount it on the edge of a desk or through a bench so the monitor is suspended above the work area. It folds into just 4.5″ of space, extends up to 27″, and has an 18″ vertical range. An internal cable management system conceals all cables in the arm, and repositioning the monitor is easy since there are no knobs to turn. The Radial Arm can handle up to 44 lbs., so it supports all of our configurations except for our 19″ and 22″ NEMA 4X Universal Mount Monitors with the attached stainless steel keyboard. Display can tilt up to 200°.
- VESA Wall Mount Bracket – an easy solution for a space-saving mount option. The bracket can be mounted on any vertical surface and you can easily reposition the monitor without turning any knobs. A 3.5″ extender is included, allowing the monitor to stand 7.56″ from the mounting surface (4.06″ without extender). Monitor can be tilted 15° up/down and left/right (30° each direction with included extender). The Wall Mount Bracket has a 45 lb. weight limit.
- VESA Benchtop Stand – a sturdy aluminum base provides a secure platform on any flat surface for our Universal Mount Monitors. You can easily adjust monitor height (14″ pole height) and angle (up to 200° tilt), and a built-in rotational stop adds safety and stability. The Benchtop Stand supports up to 45 lbs.
Once you’ve figured out which cover plate to use (from Part I) and how you want to mount your monitor, you have completed a basic Universal Mount Monitor configuration! Now you can decide which additional options you would like to add, such as a keyboard, KVM extender, PC enclosure, or screen protectors.